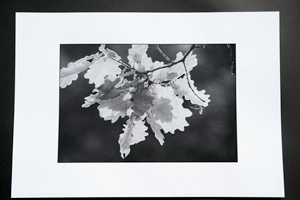
FIRST INKING (for adjusting the inking) :
- Once the plate has been first wetted with the glycerine-water mixture, the proofing operations can be started.
- Ink the dispensing rollers. Disengage the cylinder from the press so that it does not drive a sheet, and make the rollers go back and forth, passing over the gelatin, the time of adjustment of the inking. This is followed by a first print to see the quality of the plate and check the inking of the rollers. (It often takes 7 to 10 passes of the rollers before having the inking that one desires). At this point, the printing pressure must be very low.
- Make a proof with a sheet, then put a second sheet on the blanket to increase the pressure without having to change the setting of the pressure of the machine. Stop the print because the gelatin is still too sticky at this stage, that is to say that the sheet of paper has too much trouble separating from the gelatin plate after having undergone the pressure. What follows tends to improve this phenomenon.
DRAW IMPRESSIONS :
- Clean the plate. Immediately wetting with pure water over the entire surface of the plate, for a few minutes only (2 or 3 minutes). For this, pour the water on the plate and spread it quickly over the entire surface with the hand without running on the edges. Then wipe the plate, pour a little pure glycerin on the surface of the plate and spread it gently with your fingers. Wipe the edges of the plate with a dry cloth. Leave this pure glycerin on the surface, and carry it over to a new wetting with the glycerine mixture & water which should be allowed to act for about 30 minutes. At the end, remove the solution, swab the plate. To resume the draw, and to regulate the pressure during the first tests, starting rather with a lack of pressure than an excess.
- Note that too much pressure will always be detrimental. Indeed, an excess of pressure causes a drying of the gelatin in the parts which should remain wet. This will push back the ink less and less, and an ink veil will form in the non-insolated parts. This is a very common cause of failure in this printing process. We obtain a correct image but veiled margins.
- How to protect margins from excessive pressure? Make a “bet” by cutting a rectangle of the exact size of the image to be printed in a thick sheet of paper. Stick it on a larger sheet. Continue making, sticking on the rectangle of fine paper cutouts corresponding to the most insolated areas of the image. Position this setting under the blanket by matching the rectangle and the image on the plate. During printing, the optimum pressure will be exerted on the image, but not on the rest of the gelatin plate which will thus retain its moisture and its ability to repel the ink during the passage of the rollers. It is recalled that although the collotype is a printing process called “flat”, the insolated parts swell less than the non-insolated parts when wetting water / glycerin. The “mise” therefore has the role of correctly supporting the sheet so that it goes to collect the ink on the plate in the hollower parts (the most insolated parts), without crushing (thus drying) the parts less or not insolated, allowing them to retain their moisture.
- How to adjust just enough pressure? Start the print with a slight lack of pressure: the image does not form completely on the whole surface. Then increase the pressure little by little until the complete formation of the image on the printed proofs.